

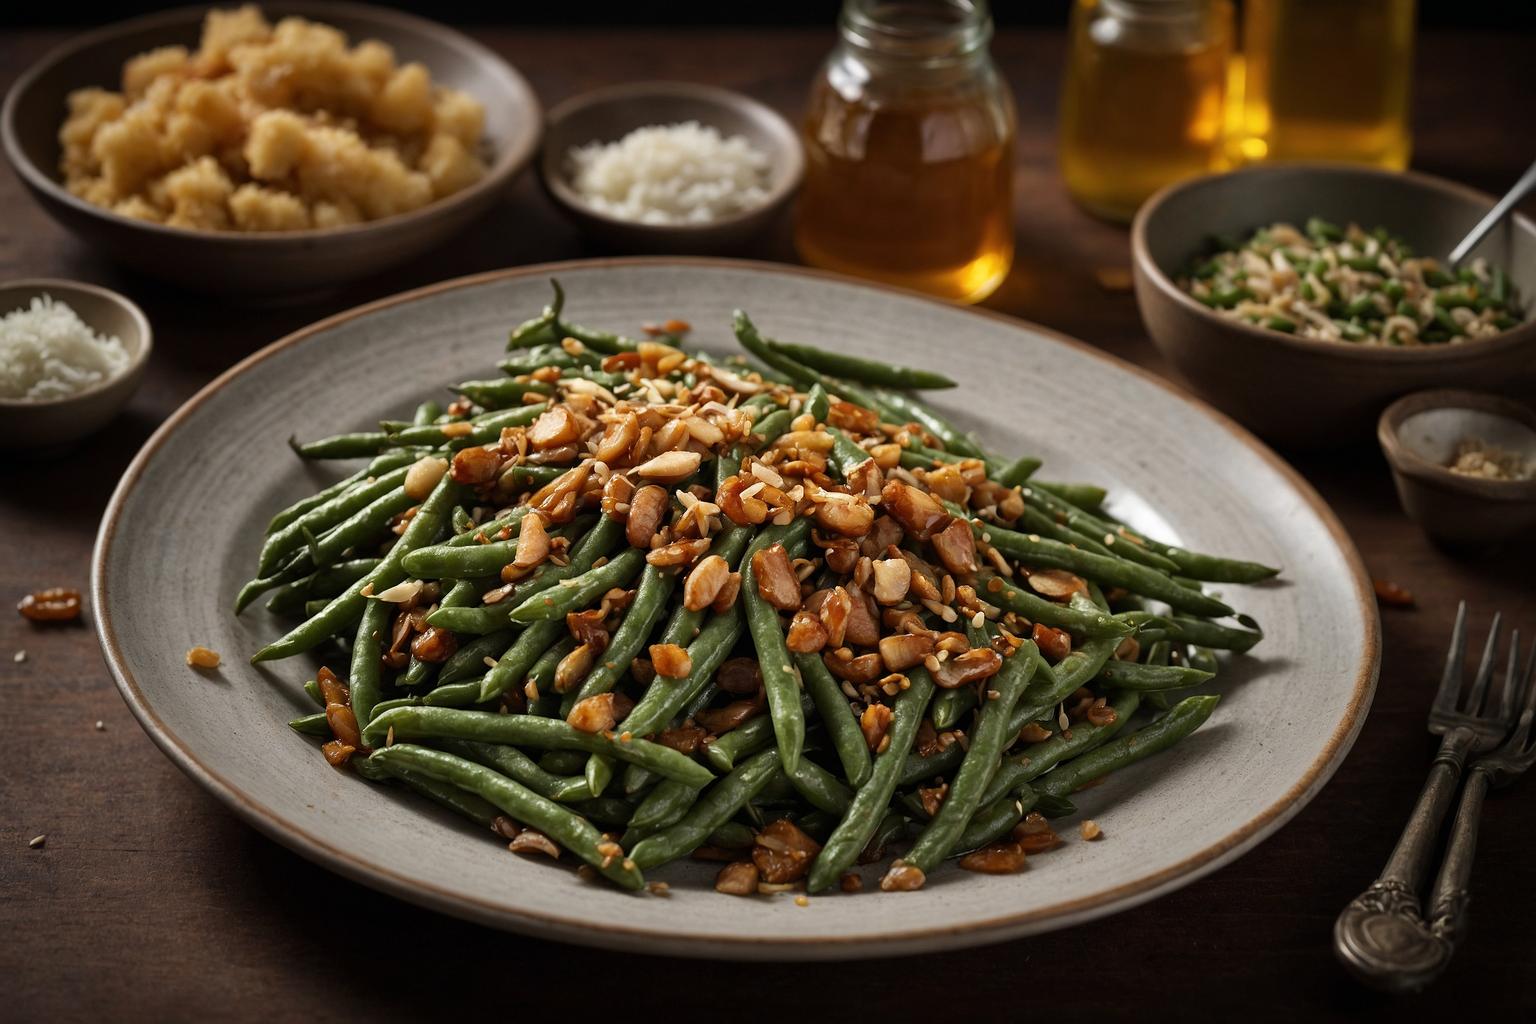
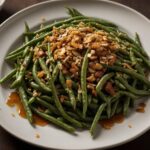
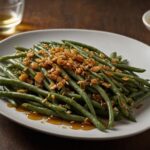
Fast, glossy green beans tossed in a sticky garlic-honey glaze. Honey Garlic Green Beans – extra thick delivers weeknight ease and big flavor—save this recipe!
Honey Garlic Green Beans – extra thick (Thick Glaze)
Meet your new weeknight hero: a skillet of glossy, garlicky beans wrapped in a clinging, sticky-sweet glaze. Honey Garlic Green Beans – extra thick is the kind of side dish that steals the show from whatever else is on the plate. It’s fast, wildly flavorful, and balances savory, sweet, and tangy notes with just a whisper of heat.
We build texture first—blanch for snap, then finish in the skillet—before pouring on a cornstarch-kissed sauce that tightens to a beautiful sheen in under two minutes. The result? Beans that stay crisp-tender under a lacquered glaze that actually sticks to the vegetables instead of slipping off onto the plate.

Honey Garlic Green Beans – extra thick
If you’ve ever wished for a thicker, restaurant-style honey garlic sauce that truly coats, this version is for you. A quick slurry, the right pan heat, and a minute of stirring transform a simple mix of honey, soy, vinegar, and garlic into a restaurant-worthy glaze. Serve it beside roasted salmon, pan-seared tofu, or a bowl of steamed rice for a complete meal.
Why You’ll Love It
- That glossy, clingy finish. The glaze is intentionally thick, so it hugs every bean.
- 15–20 minutes, fridge to table. Blanch, sauté, glaze. Dinner-friendly fast.
- Crisp-tender texture. Blanching locks in bright color and snap; finishing in the skillet adds flavor.
- Flexible and forgiving. Swap soy for tamari, butter for oil, honey for maple, and tweak heat to taste.
- Meal-prep friendly. Reheats beautifully for lunches and busy weeknights.
New to blanching? This quick par-cook plus ice bath step makes vegetables vivid and crisp. You can read more technique notes at Food Network.
Ingredients
- 1 1/2 pounds fresh green beans, ends trimmed
- 1 tablespoon kosher salt (for blanching water)
- 2 tablespoons unsalted butter (or 2 tablespoons olive oil for dairy-free)
- 1 tablespoon toasted sesame oil (optional, adds nutty depth)
- 5 cloves garlic, finely minced (about 1 1/2 tablespoons)
- 1/2 teaspoon crushed red pepper flakes (optional heat)
- 1/3 cup honey (for vegan, use maple syrup)
- 3 tablespoons low-sodium soy sauce (use tamari or coconut aminos for gluten-free)
- 2 tablespoons rice vinegar (or apple cider vinegar)
- 1 teaspoon grated fresh ginger (optional but recommended)
- 1 tablespoon cornstarch (for extra-thick cling; use arrowroot if avoiding corn)
- 1/2 cup water or low-sodium vegetable broth
- 1 teaspoon fresh lemon juice (brightens the glaze)
- Freshly ground black pepper, to taste
- 2 tablespoons sliced green onions, for garnish
- 1 tablespoon toasted sesame seeds, for garnish
Substitutions & swaps: No fresh beans? Use 1 pound high-quality frozen whole green beans and skip the blanch; cook from frozen in the skillet until hot, then glaze. No cornstarch? Reduce the sauce longer and add 1 teaspoon butter at the end for body.
Step-by-Step Instructions
- Boil and prep. Bring a large pot of water to a rolling boil and add 1 tablespoon salt. Trim the beans while it heats.
- Blanch. Add beans and cook 3 minutes until bright green and crisp-tender. Don’t overcook.
- Shock. Transfer to an ice bath for 1–2 minutes to stop cooking. Drain well and pat dry so the sauce sticks.
- Make the slurry. In a bowl, whisk honey, soy sauce, rice vinegar, ginger (if using), water/broth, and cornstarch until completely smooth. Keep it nearby; cornstarch settles fast.
- Sauté aromatics. Heat a large skillet over medium. Add butter and sesame oil. Stir in garlic and red pepper flakes; cook 30–45 seconds until fragrant. Avoid browning.
- Thicken the glaze. Whisk the slurry again and pour it into the hot pan. Stir constantly for 60–90 seconds. You’ll see it go from thin to glossy and extra thick.
- Coat the beans. Add the beans and toss with tongs 1–2 minutes to coat every surface. Squeeze in the lemon juice and add black pepper.
- Adjust. If the sauce gets too tight, add 1–2 tablespoons water. If it’s too loose, simmer another 30–60 seconds.
- Garnish. Sprinkle with sesame seeds and green onions.
- Serve. Plate immediately while the glaze is shiny and clingy.
For more fast mains to pair with this, browse Easy Weeknight Dinners and our favorite Vegetable Sides. Planning ahead? See Meal Prep for make-ahead tips.
Expert Tips
- Pat the beans dry. Water dilutes the sauce and prevents it from clinging. Dry beans = thicker coating.
- Re-whisk the slurry right before pouring. Cornstarch sinks. A quick whisk prevents lumps and ensures even thickening.
- Watch the heat. Medium to medium-low is perfect for thickening without scorching honey or garlic.
- Salt the blanching water. Seasoning from the inside out means you won’t need to over-salt the glaze.
- Texture cues. The glaze is ready when a spatula leaves a clear trail that slowly closes. If it puddles thinly, cook 20–30 seconds longer.
- Make-ahead move. Blanch and shock beans up to 2 days in advance. Dry thoroughly, refrigerate, and glaze to order.
- Scaling. Double everything, but cook in two batches or use a wider skillet so the sauce reduces properly and the beans sear, not steam.
- No cornstarch? Simmer the sauce 3–5 minutes to reduce. It won’t be quite as thick, but it will still cling nicely.
- Frozen beans tip. Skip the blanch. Sauté from frozen in a dry skillet to evaporate ice, then add fat and proceed with the glaze.
- Learn more on chilling and storage. For general food safety timelines, see U.S. FoodSafety.gov.
Storage
- Refrigerator: Store in an airtight container for 3–4 days. Reheat in a nonstick skillet over medium with a splash of water to re-gloss the sauce.
- Freezer: Not ideal for peak texture, but you can freeze up to 2 months. Thaw overnight and reheat gently; the sauce may loosen—simmer briefly to tighten.
- Meal prep: Portion into containers with rice or quinoa. Reheat covered at 50% power in the microwave, stirring once.
Variations
- Vegan: Use olive oil (or vegan butter) and maple syrup instead of honey.
- Gluten-free: Swap soy sauce for tamari or coconut aminos.
- Dairy-free: Use olive oil in place of butter.
- Refined-sugar-free: Use maple syrup; the glaze still thickens beautifully with cornstarch.
- Spicy: Add 1–2 teaspoons chili crisp or sambal oelek with the garlic.
- Citrus twist: Finish with orange zest instead of lemon for a sweeter, aromatic lift.
- Nutty umami: Stir in 1 teaspoon white miso after thickening for savory depth.
FAQ
Can I make Honey Garlic Green Beans – extra thick without cornstarch?
Yes. Simmer the sauce 3–5 minutes to reduce, then finish with 1 teaspoon butter or a drizzle of oil for body. It won’t be quite as thick but will still coat well.
Do I have to blanch the beans first?
No, but blanching locks in color and texture. If skipping, sauté the beans 6–8 minutes until just tender before adding the glaze.
Can I use frozen green beans?
Absolutely. Sauté from frozen to drive off moisture, then proceed. Expect 1–2 extra minutes to reheat through.
What’s the best way to reheat without over-softening?
Use a nonstick skillet over medium heat with a tablespoon of water. Toss until hot and glossy, 2–3 minutes.
Why did my sauce turn gummy?
Too much cornstarch or over-reducing. Thin with water 1 tablespoon at a time over low heat, stirring, until it loosens to a sheen.
Can I double the recipe?
Yes. Cook in batches or use an extra-wide pan so the sauce thickens instead of steaming the beans.
Call to Action
Did you make this? Tell me how it went! Leave a comment with your tweaks, rate the recipe, and save it for later. If you snapped a photo, tag it so others can find and cook these glossy, garlicky beans too.


