

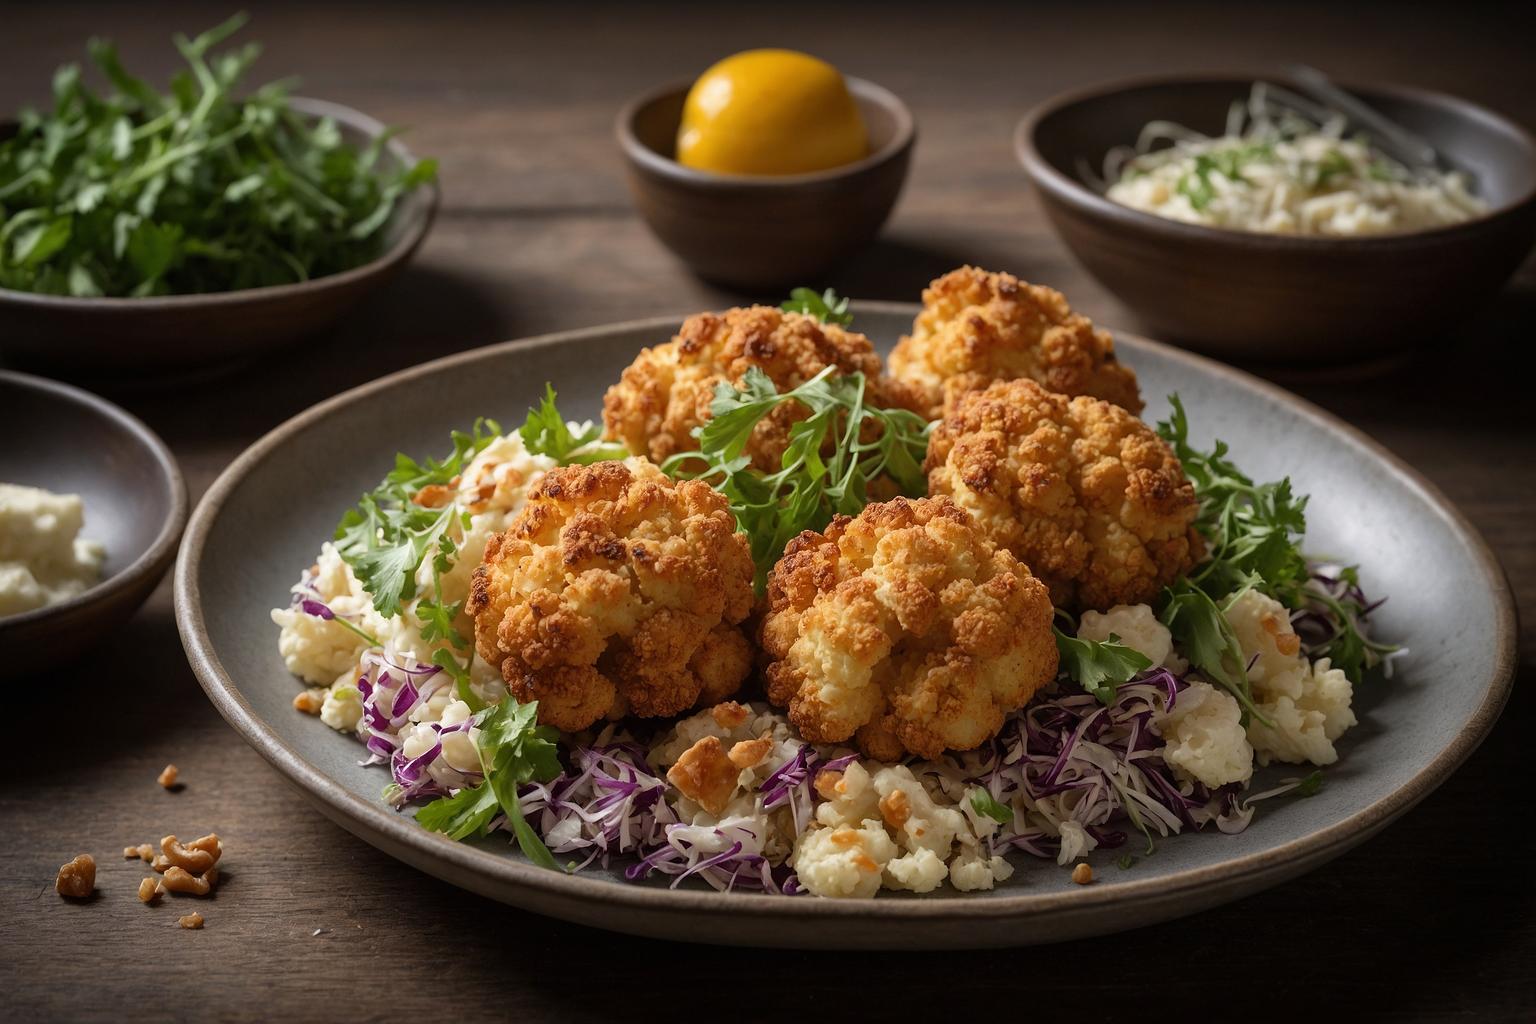
No-Bake Zesty Crispy Baked Cauliflower (from scratch) delivers big crunch and bright flavor in skillet-fried buns—no oven needed. Make it today and savor.

No-Bake Zesty Crispy Baked Cauliflower (from scratch)
Meet your new weeknight favorite: No-Bake Zesty Crispy Baked Cauliflower (from scratch) packed into fluffy stovetop buns. You get bakery-style buns without turning on the oven, and cauliflower that tastes oven-crisp thanks to a smart skillet method. The result is bold flavor, bite, and a soft roll to hold it all—perfect for sliders, snacks, or a simple dinner.
These buns cook right on the stovetop with a quick steam-and-sear technique. The cauliflower gets a light, crunchy coat, then a bright lemon glaze. Everything comes together fast with pantry staples. If you love easy, satisfying recipes, add this one to your rotation. It’s great for meal prep and even better for sharing.
Looking for more low-effort wins? Try our Easy Weeknight Dinners, keep the oven off with Air Fryer Recipes, and brush up on dough basics with How to Make Buns. For technique deep-dives, check out Serious Eats on pan-frying science and King Arthur Baking on yeast handling.
Why You’ll Love It
- Truly no oven. The buns steam-fry in a skillet and the cauliflower crisps on the stovetop.
- Big flavor, light feel. Zesty lemon glaze brightens every bite.
- Budget-friendly. A head of cauliflower and simple dough feed a crowd.
- Flexible. Make it mild or spicy, dairy-free or vegan.
- Meal-prep friendly. Dough can chill, and cauliflower reheats well.
Ingredients
Here’s what you’ll need, plus easy swaps.
Stovetop Buns
- All-purpose flour – Use bread flour for extra chew; use half whole-wheat for nuttiness.
- Instant yeast – Fast and reliable. Active dry works; bloom 10 minutes first.
- Sugar – Feeds the yeast and boosts browning. Maple or honey also work.
- Fine sea salt – For balanced flavor.
- Warm milk or water – Milk gives a softer crumb; water keeps it extra light.
- Neutral oil – Helps tenderness and prevents sticking.
Crispy Cauliflower
- Cauliflower – Cut into even florets for even cooking.
- Cornstarch + a pinch of baking powder – Ultra-crisp outside without deep frying.
- Smoked paprika, garlic powder, cumin – Savory base flavors.
- Kosher salt + black pepper – Essential seasoning.
- Neutral oil – High smoke point for clean sear.
Zesty Lemon Glaze
- Lemon zest + juice – Bright and fresh.
- Honey or maple – Sweet balance; use maple to keep it vegan.
- Dijon + cider vinegar – Tang and depth.
- Hot sauce – Optional heat; red pepper flakes also work.
Quick Slaw & Garnish
- Shredded cabbage – Adds crunch. Swap with thinly sliced lettuce.
- Yogurt or mayo – Creaminess; use dairy-free to keep it vegan.
- Cilantro or parsley – Fresh herb finish.
- Sesame seeds, extra lemon – Optional but great.
Step-by-Step Instructions
- Mix the dough. Whisk warm milk (or water), sugar, and yeast. Let sit 5 minutes until slightly foamy.
- Knead. Add flour, salt, and oil. Stir to combine, then knead 3–4 minutes until smooth and just tacky. Lightly oil the bowl and dough.
- Rise. Cover and let rise in a warm spot until doubled, about 35–45 minutes. For more flavor, refrigerate up to 12 hours and proceed cold.
- Prep cauliflower. Cut into even florets and pat dry well so the coating sticks.
- Season and coat. In a large bowl, mix cornstarch, baking powder, paprika, garlic powder, cumin, salt, and pepper. Toss florets to coat; shake off excess.
- Pan-crisp batch one. Heat 1–2 tbsp oil in a wide skillet over medium-high. Add half the florets in a single layer. Sear 6–8 minutes, turning now and then, until golden and crisp. Transfer to a plate.
- Pan-crisp batch two. Add a touch more oil if needed and repeat with remaining florets.
- Make the glaze. Whisk lemon zest, lemon juice, honey (or maple), Dijon, vinegar, hot sauce, and salt.
- Glaze briefly. Return all florets to the pan over medium-low. Pour in the glaze and toss 30–60 seconds until lightly sticky and glossy. Remove from heat.
- Stir the slaw. Mix cabbage, yogurt (or mayo), herbs, and a pinch of salt and pepper. Keep chilled.
- Shape buns. Turn dough onto an oiled surface. Divide into 8 pieces. Cup each piece and roll into a tight ball. Rest 5 minutes.
- Steam-fry. Heat a large nonstick skillet on medium with 1 tsp oil. Add dough balls and press to 3-inch rounds. Cook 1 minute, pour in 1/4 cup water, and cover. Steam 4–5 minutes. Uncover and cook 2–3 minutes until bottoms are golden and tops feel set and spring back.
- Assemble. Split buns. Add slaw, pile on the cauliflower, garnish with herbs and sesame, and finish with a squeeze of lemon.
That’s it—oven-free buns with crispy, zesty cauliflower that tastes like it came from a bakery kitchen. For more no-fuss inspiration, check out our One-Bowl Baking collection.
Expert Tips
- Keep it dry. Dry florets help the starch stick and crisp.
- Don’t crowd the pan. Work in batches for real crunch.
- Heat management. Medium-high builds color fast; drop to medium-low for glazing so the sugars don’t burn.
- Bun doneness cues. Tops look matte and feel springy; bottoms are golden and lightly crisp.
- Make-ahead dough. Refrigerate the dough up to 24 hours. Shape cold and allow 10–15 minutes at room temp before cooking.
- Air fryer option. For the cauliflower, air fry at 400°F for 10–12 minutes, shaking once, then toss with glaze in a warm skillet.
- Scaling. Double both dough and cauliflower for 16 buns; cook in two skillets or in waves.
- Flavor boosts. Add lemon pepper to the coating or stir grated Parmesan (or vegan parm) into the slaw.
Storage
- Buns: Cool fully, then store airtight at room temp 1 day, or refrigerate up to 4 days. Reheat in a covered skillet 1–2 minutes per side.
- Cauliflower: Refrigerate in a covered container up to 3 days. Re-crisp in a hot skillet or air fryer 2–3 minutes; add glaze after reheating if you prefer.
- Slaw: Best within 24 hours. Keep refrigerated.
- Freezer: Freeze buns (unsliced) up to 2 months. Thaw, then steam-fry 1–2 minutes to refresh. Cauliflower is best fresh; if frozen, re-crisp well.
Variations
- Vegan: Use water or plant milk for buns, maple in the glaze, and vegan mayo or a tahini-lemon sauce for the slaw.
- Dairy-free: Choose water or plant milk and dairy-free mayo or yogurt.
- Gluten-free: The coating is gluten-free; for buns, use a 1:1 gluten-free flour blend and add 1 tsp psyllium husk for structure. Or serve in lettuce cups.
- Refined-sugar-free: Use maple syrup for the glaze and skip sugar in the dough; proof may be a touch slower.
- Extra spicy: Add chili flakes to the coating and a splash more hot sauce to the glaze.
- Herb-forward: Fold chopped dill or parsley into the dough and slaw.
FAQ
- Can I make No-Bake Zesty Crispy Baked Cauliflower (from scratch) without a nonstick skillet?
- Yes. Use a well-seasoned cast-iron pan and preheat it well. Add oil and avoid overcrowding to prevent sticking. A stainless pan also works if preheated and oiled.
- Is the cauliflower actually baked?
- It’s “baked-style.” The cornstarch coating and skillet method mimic oven-crisp texture without turning on the oven. You can also air fry for a similar result.
- How do I keep the buns soft?
- Don’t overcook after the steam phase. When the tops look matte and spring back, they’re done. A splash more water and 30 seconds of steam can rescue buns that feel dense.
- Can I make the dough ahead?
- Yes. Refrigerate the dough up to 24 hours after the first knead. Shape cold, rest briefly, then cook as directed.
- What should I serve with these buns?
- Try a crisp salad, quick pickles, or roasted sweet potatoes. A tangy yogurt dip or extra glaze on the side is great for dunking.
- How do I re-crisp leftovers?
- Skillet or air fryer heat brings the crunch back. Warm the buns covered, then add cauliflower and heat just until hot and crisp.
Call to Action
If you tried these buns, leave a comment and tell us how it went. Save this recipe to your favorite board, share it with a friend, and tag your remake. Your tips help others get great results, too!


