

Crisp-tender beans in a glossy garlic-honey glaze. Honey Garlic Green Beans – extra thick delivers bold flavor in minutes. Try this easy side tonight.
Meet your new go-to veggie side: a skillet full of crisp-tender green beans tossed in a glossy glaze that tastes like takeout but cooks faster than your oven preheats. If you love sticky-sweet, garlicky sauces that cling to every bite, you’ll flip for Honey Garlic Green Beans – extra thick. This is the kind of quick win that upgrades any protein, from roasted chicken to tofu, without breaking a sweat.

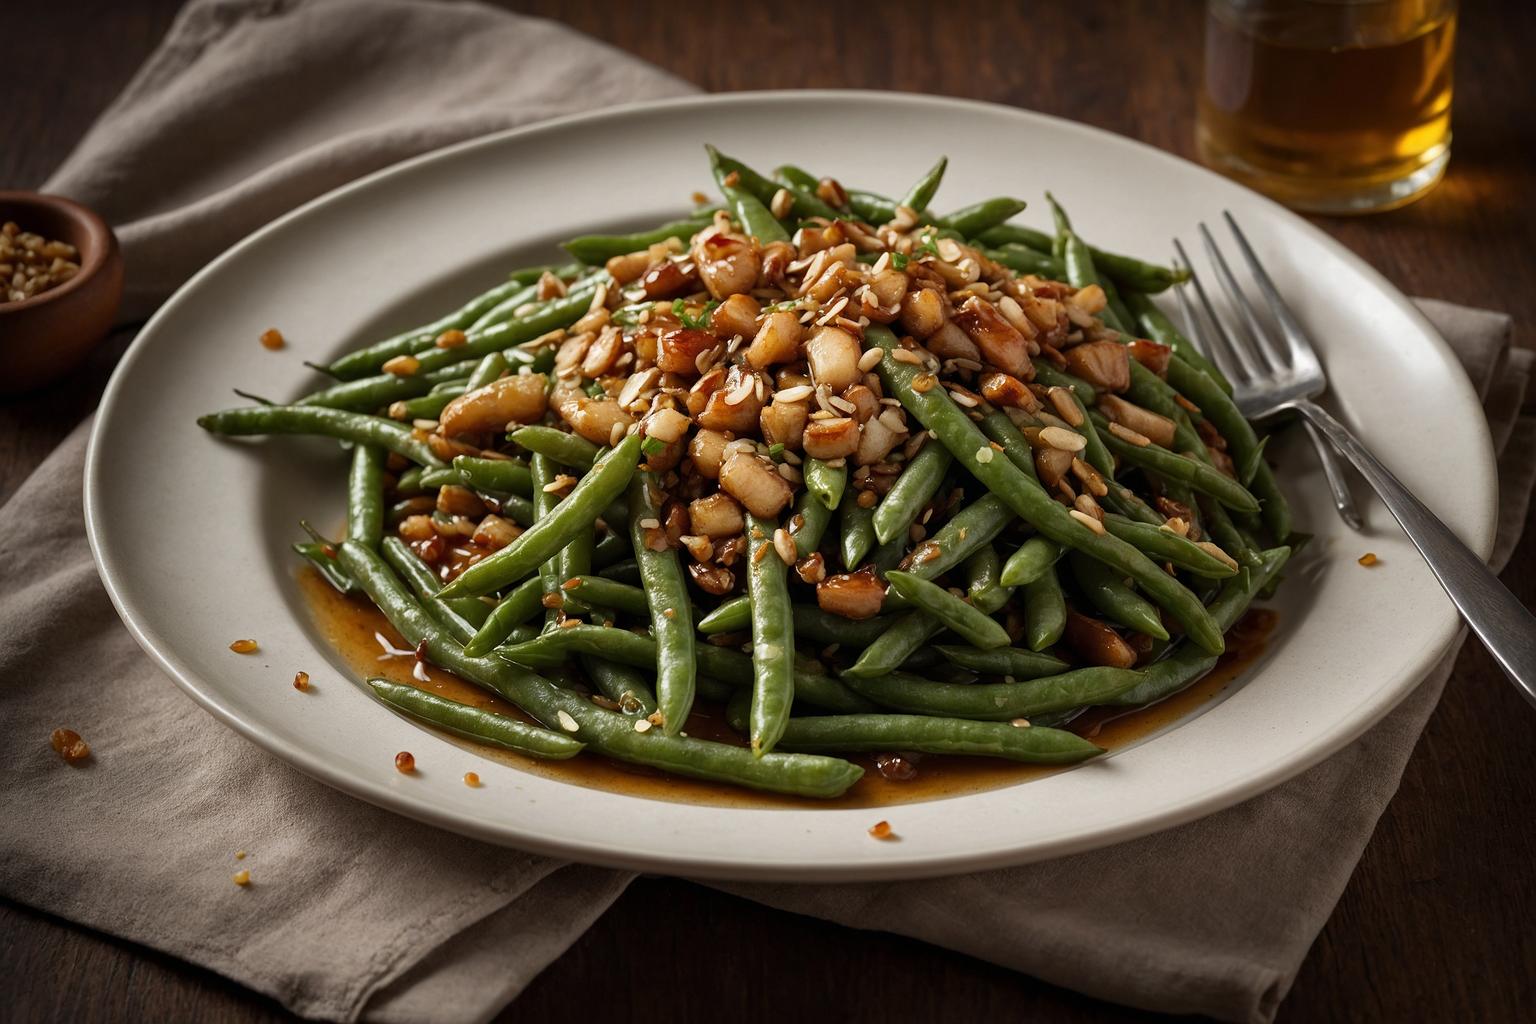
Honey Garlic Green Beans – extra thick
This recipe doubles down on texture: the beans stay snappy while the sauce is deliberately thick, almost lacquered. The secret is two-fold. First, high heat gives you a quick sear and a bit of blister. Second, a small cornstarch slurry transforms a simple honey–soy–garlic mixture into a shiny glaze that hugs every bean. It’s weeknight-easy, holiday-worthy, and wildly adaptable.
Serve it alongside salmon, steak, pork chops, or a bowl of steamed rice and a fried egg. And if you’re planning an entire menu, peek at Easy Weeknight Dinners and our collection of Vegetable Sides for more ideas.
Why You’ll Love It
- Fast: 20–25 minutes start to finish, with a single skillet.
- Extra-thick glaze: A quick slurry yields that coveted sticky, glossy finish.
- Crisp-tender beans: High heat keeps their color and snap intact.
- Flexible: Easy swaps for vegan, gluten-free, and spice levels.
- Make-ahead friendly: The sauce can be mixed in advance; beans reheat well for meal prep.
- Family-approved: Balanced sweet-savory flavor with adjustable heat.
New to blistering green beans? A quick primer on technique helps. For more background on getting veggies crisp-tender without overcooking, see this overview from Food Network.
Ingredients
- 1 1/2 pounds fresh green beans, trimmed (haricots verts cook faster)
- 1 tablespoon olive oil (or avocado oil)
- 1 tablespoon unsalted butter (optional; use all oil to keep dairy-free)
- 4–5 cloves garlic, finely minced (about 1 1/2 tablespoons)
- 3 tablespoons honey (sub: maple syrup for vegan)
- 2 tablespoons low-sodium soy sauce (sub: tamari for gluten-free, or coconut aminos with a pinch more salt)
- 1 tablespoon rice vinegar (sub: apple cider vinegar or 2 teaspoons lemon juice)
- 1/4 teaspoon crushed red pepper flakes (optional)
- 2 teaspoons cornstarch (sub: 1 tablespoon arrowroot; add off heat to avoid thinning)
- 2 tablespoons cold water (to make the slurry)
- 2–3 tablespoons water (for a quick steam if beans need help softening)
- 1 teaspoon toasted sesame oil (optional, for a nutty finish)
- Kosher salt and freshly ground black pepper, to taste
- 1 teaspoon lemon zest or a squeeze of lemon juice (optional)
- 1 teaspoon toasted sesame seeds or chopped almonds (optional garnish)
Ingredient notes: Use fresh, firm beans with bright color and no limp spots. If using frozen green beans, don’t thaw; cook from frozen and allow an extra 2–3 minutes to evaporate moisture before saucing.
Step-by-Step Instructions
- Prep the beans. Rinse, dry thoroughly, and trim the stem ends. Drying matters—water dilutes the glaze and prevents good blistering.
- Mix the sauce. In a bowl, whisk honey, soy sauce, and rice vinegar until smooth. In a separate small cup, stir cornstarch with 2 tablespoons cold water to make a lump-free slurry. Keep both nearby.
- Heat the skillet. Set a large skillet over medium-high heat. Add olive oil and butter. When oil shimmers and butter foams, it’s ready.
- Sear the beans. Add green beans in an even layer with a pinch of salt and pepper. Cook 4–6 minutes, tossing every minute, until they brighten and get light blistering. If they brown too fast or seem tough, splash in 2–3 tablespoons water and cover for 1 minute to steam and soften.
- Sauté the garlic. Push beans to the edges. Add minced garlic to the center with a tiny drizzle of oil if the pan looks dry. Cook 30–45 seconds, stirring, just until fragrant (don’t let it brown).
- Add the base sauce. Pour in the honey–soy mixture and the red pepper flakes. Toss to coat and bring to a lively simmer.
- Thicken to extra-thick. Stir the cornstarch slurry, then stream it into the pan while tossing the beans constantly. Simmer 30–60 seconds, until the sauce turns glossy and thick enough to cling without pooling. If it gets too thick, splash in 1–2 teaspoons water. If it’s thin, simmer another 15–30 seconds.
- Finish and serve. Remove from heat. Stir in sesame oil and, if you like, lemon zest or a squeeze of juice to brighten. Taste and adjust salt and pepper. Garnish with sesame seeds or chopped almonds. Serve hot.
That’s it—restaurant-style shine and flavor with home-cooked ease. For pairing ideas and quick mains, browse our Easy Weeknight Dinners.
Expert Tips
- Dry thoroughly: Water on the beans will thin the sauce and stop browning. After rinsing, pat dry with towels.
- Heat control: Medium-high gives you color without scorching. If garlic threatens to brown, pull the pan off heat for a few seconds.
- Glaze science: Cornstarch thickens at a simmer. Always add a cold slurry to hot liquid, and stir constantly for a silky, lump-free finish.
- Arrowroot swap: Use 1 tablespoon arrowroot instead of cornstarch, but add off heat and toss briefly—arrowroot can thin if overcooked.
- Make the sauce ahead: Mix the honey, soy, and vinegar up to 5 days in advance and refrigerate. Whisk the slurry right before cooking.
- Blanch for ultra-even texture: For company, blanch beans 2–3 minutes in salted boiling water, shock in ice water, dry, then proceed with the skillet step for perfect doneness.
- Salt smart: Soy sauce is salty. Taste before adding more salt, especially if using regular (not low-sodium) soy.
- Keep the snap: Beans are done when they’re bright green, slightly tender, and still snappy. Overcooking dulls color and softens texture.
- Double it right: Cooking for a crowd? Sear beans in two batches for good browning, then combine to sauce all at once.
- Food safety: Always rinse produce under running water before cooking. See FDA guidance on safe produce handling here.
Storage
- Fridge: Store in an airtight container for 3–4 days. The glaze will set as it cools; it loosens when reheated.
- Reheat: Warm in a skillet over medium heat with a teaspoon or two of water to re-gloss the sauce, 2–3 minutes. Microwave in 30-second bursts, stirring between, until hot.
- Freezer: Freeze up to 2 months. Texture softens slightly after thawing. Reheat from frozen in a covered skillet over medium, adding a splash of water as needed.
- Meal prep: For best texture, undercook beans by 1 minute if you plan to reheat later in the week.
Variations
- Vegan: Use oil instead of butter and swap honey for maple syrup. The rest stays the same.
- Gluten-free: Use tamari or coconut aminos instead of soy sauce. If using coconut aminos, add a pinch more salt and an extra 1/2 teaspoon cornstarch if needed.
- Dairy-free: Omit butter; use 2 tablespoons oil total.
- Refined-sugar-free: Use maple syrup. Simmer briefly to thicken; maple can reduce slightly faster than honey.
- Spicy: Add 1–2 teaspoons chili crisp or a dash of sriracha with the sauce base.
- Nutty crunch: Finish with toasted slivered almonds, peanuts, or cashews.
- Citrus twist: Add orange zest and a teaspoon of orange juice for a subtle marmalade vibe.
- Garlic lovers: Slice half the garlic into thin chips. Fry them 30–45 seconds in oil first for crispy garlic, then proceed.
- Sesame-forward: Stir in 1 tablespoon tahini with the honey–soy mix for a richer, slightly creamy glaze (add a splash of water if too thick).
FAQ
- How do I keep the sauce extra thick? Use the full 2 teaspoons cornstarch and simmer the sauce just until glossy. If it ever thins, add a small second slurry (1 teaspoon cornstarch + 1 tablespoon cold water) and simmer 15–20 seconds.
- Can I use frozen green beans? Yes. Don’t thaw. Add them straight to the hot pan and cook a few minutes longer to drive off excess moisture before adding the sauce. Expect a slightly softer bite.
- What proteins pair well? Chicken thighs, pork chops, salmon, shrimp, tofu, or tempeh. The sweet-savory glaze complements rich and lean proteins alike. Try it beside steamed rice for a simple bowl.
- Can I blanch the beans ahead? Absolutely. Blanch and shock up to 24 hours in advance, dry very well, and refrigerate. Sear briefly, then sauce to serve. This is ideal for holidays or guests.
- Are Honey Garlic Green Beans – extra thick very sweet? They’re balanced. Honey provides body and shine, but soy and vinegar keep the sauce savory with a gentle tang. Adjust honey up or down to taste.
- How do I scale for a crowd? Double all ingredients and cook the beans in two batches to avoid steaming. Combine everything to glaze at the end.
For more vegetable inspiration that’s quick and punchy, see Vegetable Sides, plan a full menu with Easy Weeknight Dinners, prep ahead with Meal Prep, and learn to tweak glazes via our Sauce Recipes hub.
Call to Action
If you made these beans, I’d love to hear how it went. Leave a comment, drop a rating, and save the recipe for later. Snap a photo and tag a friend who needs a new go-to veggie side!


