

Crave-worthy, fudgy bars made in minutes: No-Bake Chocolate Brownies — no refined sugar. Pantry staples, kid-approved, freezer-friendly. Make a batch today.
If you love rich, fudgy brownies but want a simpler, lighter option, these No-Bake Chocolate Brownies — no refined sugar will be your new go-to. They come together with pantry staples, set in the fridge, and slice into clean, glossy squares. No oven. No fuss. Just the kind of dessert you can make on a busy weeknight or before guests arrive.

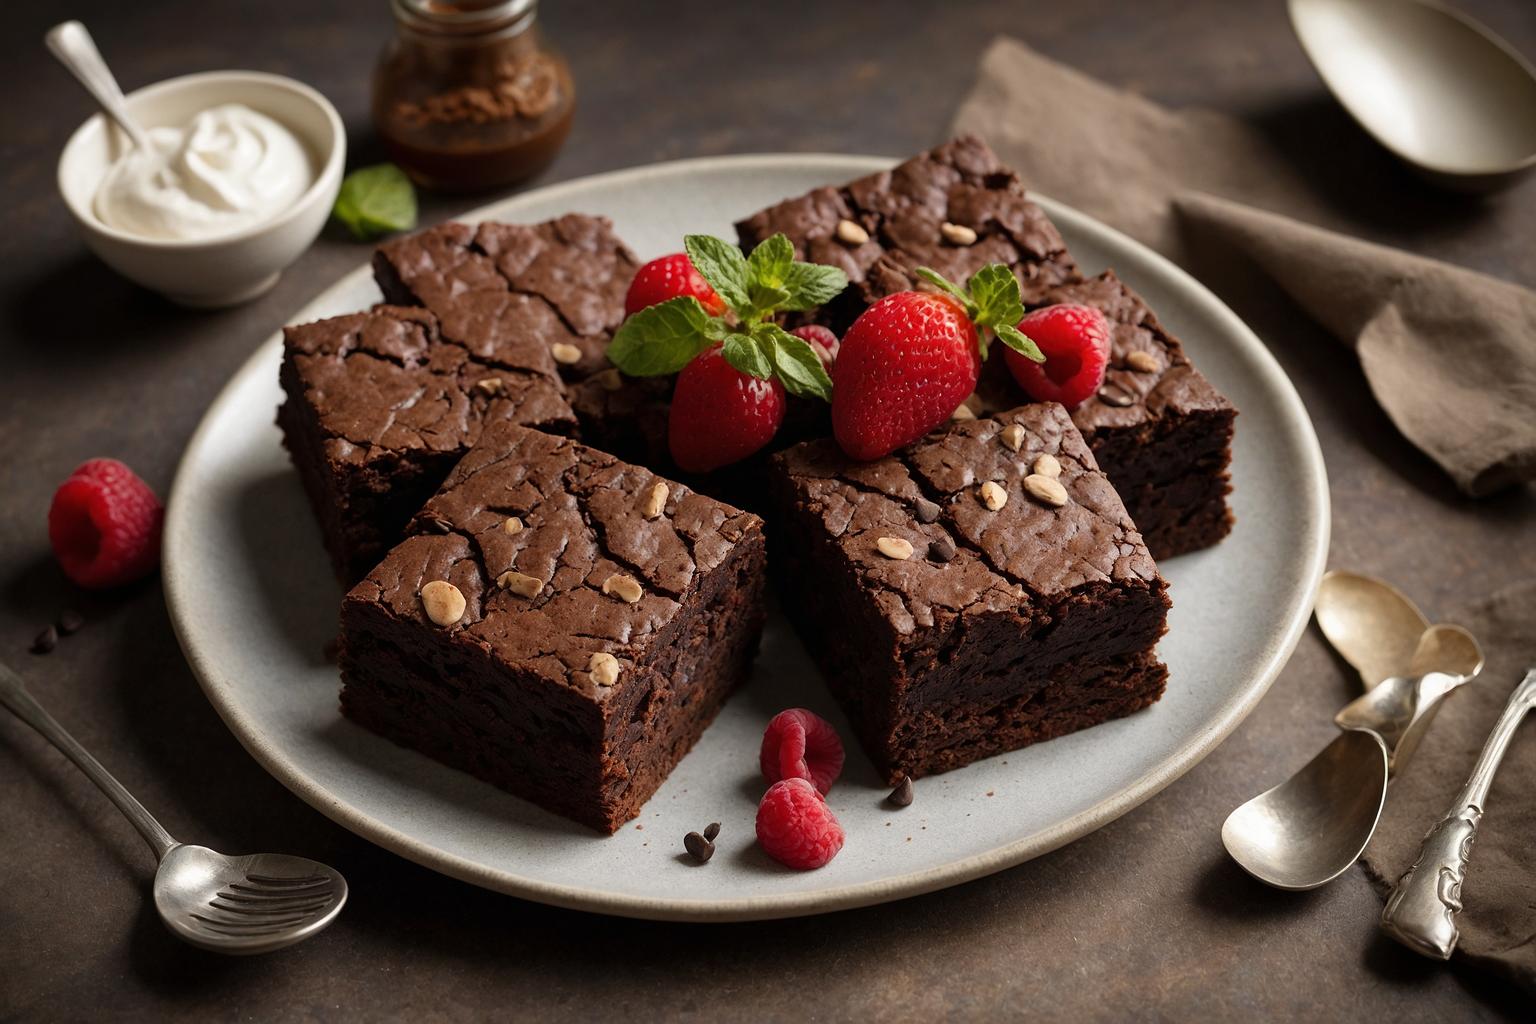
The texture is dense yet tender, much like a classic fudge brownie. The deep chocolate flavor comes from cocoa and a touch of espresso powder. Natural sweetness from dates and maple syrup keeps the taste balanced and satisfying. A quick cocoa glaze finishes the bars with a shiny top. Sprinkle with flaky salt to make the chocolate sing.
No-Bake Chocolate Brownies — no refined sugar
These wholesome brownie bars feel indulgent, but they skip refined sugar and rely on real-food ingredients. Dates add body, sweetness, and a gentle caramel note. Nuts bring richness and structure. Almond flour keeps the base tender and satisfying. The result is a dessert that sits somewhere between a truffle and a brownie, with clean slices and a melt-in-your-mouth bite.
Serve them as an after-dinner treat or pack one for an afternoon pick-me-up. They also make a smart addition to a dessert board. If you entertain often, keep a batch in the freezer. You can cut what you need and let the rest stay tucked away for later.
For more simple treats, browse our No-Bake Desserts and don’t miss our reader favorites in Chocolate Recipes. If you like prepping ahead, see Meal Prep ideas and wholesome bites under Healthy Snacks.
Why You’ll Love It
- Real ingredients. Sweetened with dates and maple syrup, not refined sugar.
- No oven needed. Your fridge does the work in under an hour.
- Fudgy and rich. Deep chocolate taste with a glossy cocoa glaze.
- Customizable. Swap nuts, add spices, or fold in cacao nibs.
- Make-ahead friendly. Chill and slice when you’re ready to serve.
- Diet-flexible. Easy to keep vegan, gluten-free, and dairy-free.
If you’re curious about the difference between natural and added sugars, see this overview from the Harvard T.H. Chan School of Public Health. For nutrition data on ingredients like dates and cocoa, visit USDA FoodData Central or guidance from the Academy of Nutrition and Dietetics.
Ingredients
Simple pantry items make a brownie with big flavor. Here’s what you need and how to swap if you’re out of something.
- Medjool dates (2 cups, packed): Soft, sweet, and sticky. They bind the base and add caramel notes. If your dates are dry, soak briefly in hot water.
- Raw walnuts (1 1/2 cups): They grind into a tender crumb and add richness. Almonds, cashews, or a mix of seeds also work.
- Almond flour (1 cup): Helps with structure and tenderness. Oat flour works for a nut-light version; use seed options for nut-free.
- Unsweetened cocoa or cacao (1/2 cup): The chocolate backbone. Cacao has a fruitier profile; cocoa is classic and smooth.
- Almond butter (1/4 cup): Adds body and a creamy finish. Peanut butter gives a nostalgic flavor. For nut-free, use sunflower seed butter.
- Coconut oil (3 tbsp): Helps set the bars and glaze in the fridge. Refined coconut oil has no coconut flavor.
- Maple syrup (2–3 tbsp in base; 3–4 tbsp in glaze): Adjust to taste. Start with less and add more if you like sweeter brownies.
- Vanilla extract (1 tsp): Rounds out the chocolate.
- Fine sea salt (1/2 tsp in base + pinch in glaze): Makes the chocolate pop.
- Instant espresso powder (1/2 tsp, optional): Deepens chocolate flavor without tasting like coffee.
- Glaze: Melted coconut oil, cocoa, maple syrup, vanilla, and a pinch of salt. Whisks up glossy and sets cleanly.
- Toppings (optional): Chopped nuts, cacao nibs, and flaky salt for crunch and contrast.
Ingredient note: The sweetness here depends on your dates and cocoa. Taste and adjust maple syrup as needed. Because there’s no refined sugar, the flavors are clean and balanced.
Step-by-Step Instructions
- Soften the dates. If the dates feel firm, cover them with hot water for 5–10 minutes. Drain and pat dry. This helps them blend smoothly.
- Prep the pan. Line an 8-inch square pan with parchment, leaving overhang. This makes lifting and slicing tidy.
- Grind the nuts. In a food processor, pulse walnuts to a fine crumb. Stop before it turns into nut butter.
- Pulse with dates. Add dates and pulse until the mix looks like damp sand and clumps when pressed.
- Add the rest. Add almond flour, cocoa, almond butter, melted coconut oil, maple syrup, vanilla, salt, and espresso powder. Blend until a cohesive dough forms. It should hold together when squeezed.
- Press into pan. Transfer the dough to the lined pan. Lay a piece of parchment on top and press very firmly with your hands or a flat-bottomed glass. Compacting well gives clean slices.
- Make the glaze. Whisk melted coconut oil, cocoa, maple syrup, vanilla, and a pinch of salt until smooth and glossy.
- Glaze the top. Pour over the base and tilt the pan so the glaze covers edge to edge. Tap to release any bubbles.
- Finish and chill. Sprinkle chopped nuts, cacao nibs, and flaky salt if you like. Chill 25–30 minutes, until set.
- Slice. Lift out with parchment. Warm a sharp knife under hot water, dry it, and cut into 16 squares. Wipe the blade between cuts for perfect edges.
- Serve. Enjoy chilled or slightly cool. The glaze will soften at warm room temps, so keep them cool for the neatest bite.
Expert Tips
- Texture check: The dough should feel moist and tacky but not wet. If crumbly, add 1–2 teaspoons maple syrup or a drizzle of coconut oil and pulse again. If too soft, add 1–2 tablespoons almond flour.
- Slice like a pro: Use a hot, dry knife and light sawing motions. Clean the blade after each cut for sharp lines and a shiny top.
- Make ahead: Assemble a day in advance. Chill and slice before serving. The flavor deepens by day two.
- Pan size: For thicker bars, use a 7-inch square pan. For thinner bars or to stretch servings, use a 9-inch pan and start checking set time at 20 minutes.
- No food processor? Finely chop the dates and nuts with a sharp knife. Then mash together in a bowl with the remaining ingredients. It takes longer but works.
- Flavor boosters: Add orange zest, cinnamon, or a pinch of chili powder for a fun twist.
- Serving temp: For the fudgiest bite, serve straight from the fridge. For a softer texture, let bars sit out 5–10 minutes.
One more reminder: Because these are No-Bake Chocolate Brownies — no refined sugar, sweetness comes from dates and maple syrup. If your cocoa is very dark, you may want an extra teaspoon of maple in the glaze to balance it.
Storage
- Fridge: Store in an airtight container for 1 week. Layer with parchment to protect the glaze.
- Freezer: Freeze up to 3 months. Wrap individual squares, then place in a freezer bag or airtight box. Thaw in the fridge for 30–60 minutes.
- Lunchbox: Pack with an ice pack. The glaze softens in heat; keep cool for best texture.
Variations
- Vegan: The base and glaze are naturally vegan when you use maple syrup and plant-based ingredients.
- Gluten-Free: Use certified gluten-free oat flour or stick with almond flour. All other ingredients are naturally gluten-free.
- Dairy-Free: These bars are dairy-free as written. If you add chocolate chunks, choose dairy-free chocolate sweetened without refined sugar.
- Nut-Free: Swap walnuts and almond flour for a seed blend, such as sunflower seeds and pumpkin seeds, plus oat flour. Use sunflower seed butter.
- Extra chocolate: Stir in cacao nibs for crunch or fold in chopped refined-sugar-free dark chocolate if you have it.
- Mocha vibe: Increase espresso powder to 1 teaspoon and add a splash of coffee to the glaze (reduce maple slightly).
- Orange-chocolate: Add 1 tablespoon fresh orange zest to the base and a pinch to the glaze.
FAQ
Can I freeze No-Bake Chocolate Brownies — no refined sugar?
Yes. Freeze sliced squares up to 3 months. Wrap well, then thaw in the fridge for 30–60 minutes or at room temperature for 10–15 minutes before serving.
What if I only have deglet dates?
Deglet dates are drier and less sweet than Medjool. Soak in hot water for 10 minutes, drain well, and taste the dough. Add an extra teaspoon or two of maple syrup if needed.
Can I make these without coconut oil?
Yes. Use melted cocoa butter for the glaze and a neutral nut or seed butter to help the base hold. The set will be a bit softer, but still sliceable when chilled.
Do I need a food processor?
It helps, but you can chop the dates and nuts very finely by hand, then mash and stir in the remaining ingredients. Press firmly to compact the base.
How sweet are these compared to classic brownies?
They are less sweet than boxed brownies. The flavor is deep and fudgy, with balanced sweetness from dates and maple syrup.
Can I skip the glaze?
Yes. The base is delicious on its own. For a lighter finish, dust the top with cocoa or add a drizzle of melted nut butter.
Call to Action
If you make these brownies, leave a comment and tell me how it went. Did you add nuts or go classic and smooth? Rate the recipe so others can find it, save it to your recipe box, and share with a friend who loves no-bake desserts. Happy baking—without the baking!


