

Bright, buttery bars with crisp shortbread and a silky citrus filling. Vanilla Bean Lemon Bars with lemon zest bake easy and slice clean—pin and share!
Buttery shortbread, sunny citrus, and aromatic vanilla come together in these classic bars you’ll make on repeat. These Vanilla Bean Lemon Bars with lemon zest have a thick, crisp-tender base and a silky custard topping that slices clean and tastes like sunshine. If you love traditional desserts with a twist, this one brings bakery-level flavor to your home oven in under two hours, cooling included.
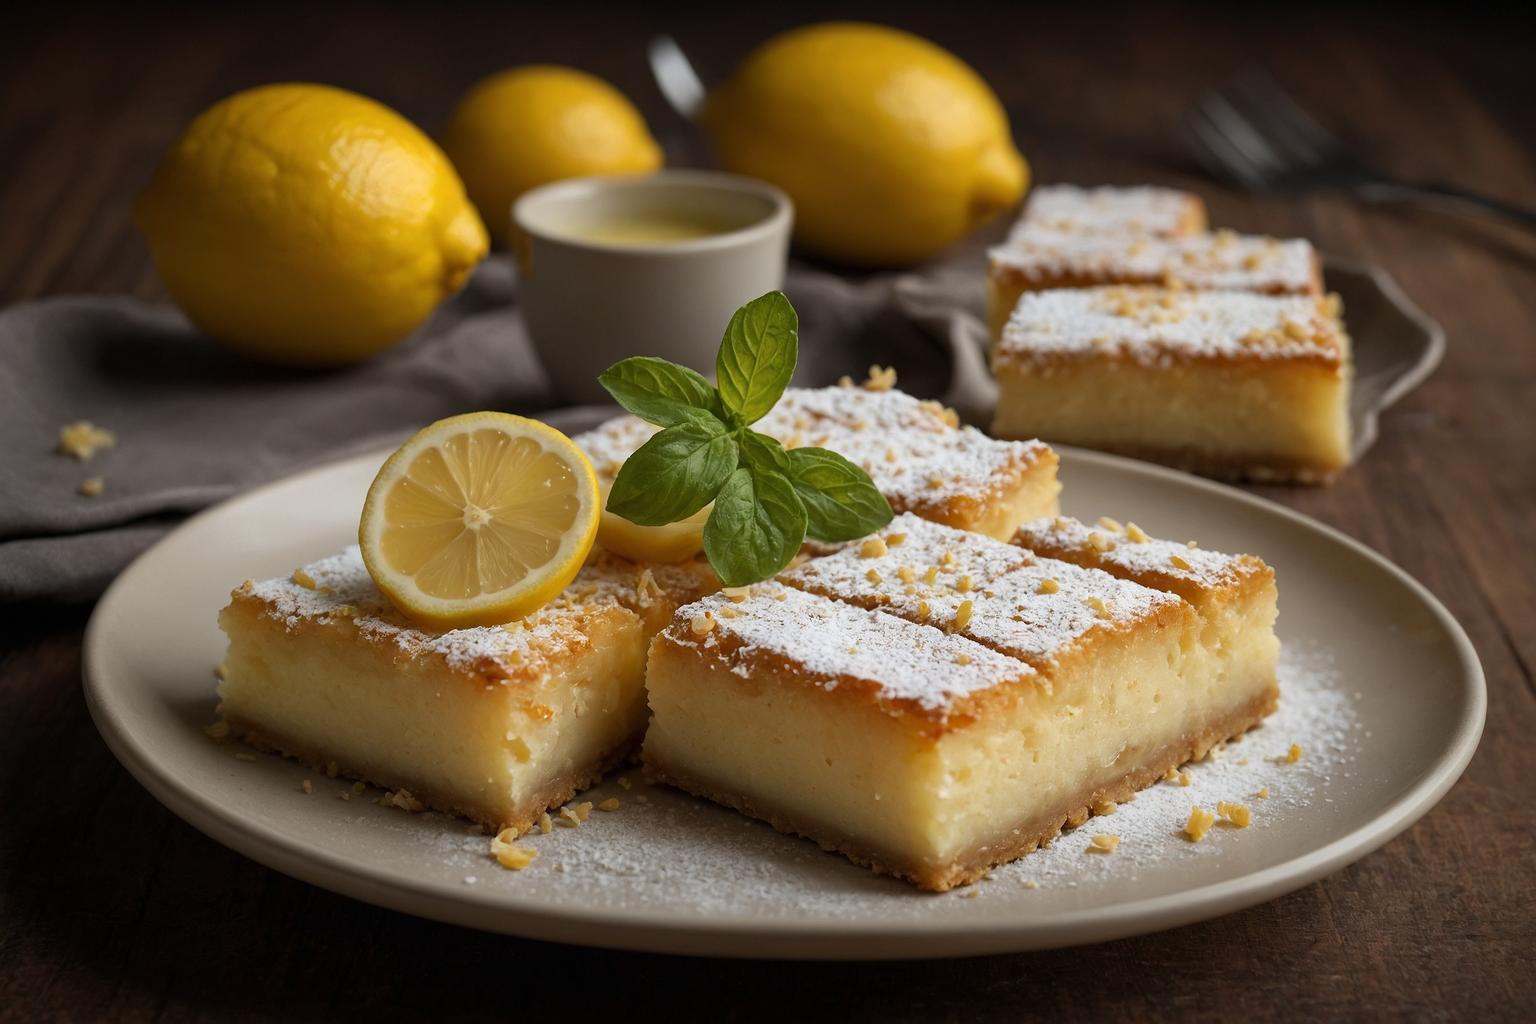
Vanilla Bean Lemon Bars with lemon zest
What makes these bars special? Real vanilla bean paste swirled through the lemon filling. You get tiny vanilla specks in every bite and a layered flavor that’s bright, buttery, and softly floral. The shortbread crust stays crisp under the custard, so each square has clean edges, a tender bite, and that classic powdered sugar finish.
New to baking citrus desserts? Start here, then explore more sweet ideas on our site, from Spring Desserts to pantry-friendly treats. Need help prepping your fruit? See How to Zest a Lemon for quick tips and tools that make zesting effortless. For measuring flour accurately, the guide at King Arthur Baking is gold for consistent results.

Why You’ll Love It
- Classic, upgraded: The vanilla bean paste deepens the lemon custard so it tastes brighter and more complex.
- Crisp crust, silky top: A sturdy shortbread holds a smooth, custardy layer that sets cleanly for neat slices.
- Foolproof method: No curd on the stovetop. Everything bakes in one pan with clear visual doneness cues.
- Make-ahead friendly: Bars chill and slice best after a rest, making them perfect for parties and gifting.
- Pantry staples: Butter, sugar, flour, eggs, lemons, and vanilla—no specialty equipment required.
- Scales well: Double for a crowd or halve for an 8-inch pan with simple timing notes below.
Ingredients
Below is everything you need for this traditional dessert, plus smart substitutions if you’re adapting to dietary needs or pantry reality.
- Unsalted butter (1 cup / 226 g), melted: For a rich, cohesive crust. Sub: Salted butter (reduce added salt), or dairy-free stick butter for a DF version.
- Granulated sugar (1/2 cup for crust + 1 3/4 cups for filling): Sweetens and supports structure. Sub: Use superfine sugar for faster dissolving; organic cane sugar works too.
- Fine sea salt (3/4 tsp total): Balances sweetness and amplifies citrus.
- All-purpose flour (2 cups for crust + 1/4 cup for filling): Crust structure and gentle thickening. GF swap: Use a 1:1 gluten-free baking blend for the crust and 2 Tbsp cornstarch in the filling.
- Large eggs (4), room temperature: Set the custard. Room temp prevents curdling and whisks more smoothly.
- Fresh lemon juice (2/3 cup): Use freshly squeezed for clean flavor. Bottled can taste flat. Zest first, then juice.
- Lemon zest (2 Tbsp), finely grated: Oils in the zest add bright, complex citrus aroma.
- Vanilla bean paste (1 Tbsp): Adds those gorgeous specks and a warm, creamy note. Sub: Seeds from 1 vanilla bean or 2 tsp pure vanilla extract.
- Powdered sugar, for dusting: The classic finish that looks bakery-ready and balances tang.
Note: For food safety with egg-based desserts, the FDA offers guidance here: Eggs and Food Safety.
Step-by-Step Instructions
- Heat oven and prepare pan: Preheat to 325°F (163°C). Line a 9×13-inch metal pan with parchment or foil, leaving overhang for easy removal. Lightly grease the sides to prevent sticking.
- Mix the crust: In a medium bowl, whisk 2 cups flour with 1/2 cup sugar and 1/2 tsp salt. Stir in melted butter until evenly moistened and crumbly like wet sand. No dry pockets should remain.
- Press and bake: Press the crust firmly and evenly into the pan, taking it all the way to the corners. Dock gently with a fork. Bake 18–20 minutes, until edges are light gold and the surface looks set.
- Make the filling: While the crust bakes, whisk 1 3/4 cups sugar, 1/4 cup flour (or 2 Tbsp cornstarch), and 1/4 tsp salt. Whisk in eggs until smooth but not frothy. Add lemon juice, lemon zest, and vanilla bean paste; whisk just to combine. Overwhisking adds air and can cause bubbles.
- Pour and bake: Reduce oven to 325°F if needed. Pour filling over the hot crust. Bake 20–24 minutes. The edges will be set and the center should have a slight, uniform jiggle when you nudge the pan.
- Cool and chill: Cool on a rack for 30 minutes, then refrigerate at least 2 hours (or overnight). This rest ensures clean slices and a silky texture.
- Finish and serve: Dust with powdered sugar. Lift out with the parchment, trim edges for the neatest look, then cut 16 squares using a warm, dry knife. Wipe the blade between cuts.
For technique refreshers on measuring and mixing, see the visual guide from Food Network.
Expert Tips
- Pan choice matters: A light-colored metal pan promotes even baking and a crisp crust. Glass can overbrown the edges; reduce temp by 15–25°F if using glass.
- Don’t overbake: Pull the bars when the center still has a soft wobble. Overbaked bars turn eggy and crack as they cool.
- Zest like a pro: Zest only the bright yellow layer; the white pith is bitter. Microplane for the finest texture that disappears into the custard.
- Room-temp eggs: Cold eggs can seize the fat and create a grainy filling. Submerge eggs in warm water for 5–10 minutes to quickly warm.
- Sift for a flawless top: If your sugar is lumpy, sift the dry ingredients. Fewer bubbles = a smoother, glossy finish.
- Clean slices: Chill fully, then use a long, sharp knife warmed under hot water and dried. Wipe between cuts for crisp edges.
- Flavor balance: If your lemons are very sour, add 1–2 tsp extra sugar. If they’re mild, add 1 tsp more zest for brightness.
- Make-ahead: Bake the day before serving. These Vanilla Bean Lemon Bars with lemon zest actually taste better once the flavors meld overnight.
- Powdered sugar timing: Dust just before serving; the surface can absorb sugar over time, especially in humid climates.
- Scale it: For an 8×8-inch pan, halve the recipe and start checking at 16–18 minutes for the filling.
Storage
Refrigerator: Store the cut bars in a single layer in an airtight container for 4–5 days. If stacking, separate layers with parchment to protect the tops.
Freezer: Freeze un-dusted bars on a sheet tray until firm, then wrap individually and place in a freezer bag for up to 3 months. Thaw overnight in the fridge and dust with powdered sugar before serving.
Room temp: For serving, bars can sit out for 2 hours. Return leftovers to the fridge promptly.
Variations
- Gluten-Free: Use a 1:1 gluten-free baking flour for the crust and swap the filling’s flour for 2 Tbsp cornstarch. Bake times are similar; look for the same visual cues.
- Dairy-Free: Use a quality plant-based butter stick for the crust. All other ingredients are naturally dairy-free.
- Vegan: Use a vegan butter for the crust and replace eggs with 1 cup unsweetened silken tofu blended smooth with the sugar, lemon juice, zest, vanilla, and starch (3 Tbsp cornstarch). Bake a few minutes longer until just set.
- Refined Sugar–Reduced: Swap 1/4 of the granulated sugar for maple sugar or coconut sugar. Note: color will darken slightly and flavor will be more caramel-like.
- Extra tangy: Add up to 1 additional Tbsp lemon zest and a splash of lemon extract if you prefer a sharper citrus bite.
- Berry swirl: Marble in 1/3 cup strained raspberry puree before baking for a pink swirl and tart counterpoint.
FAQ
How do I know when lemon bars are done?
Look for set edges and a soft, uniform jiggle in the center when you nudge the pan. If it ripples like liquid, bake another 2–3 minutes. They’ll firm as they cool.
Can I use bottled lemon juice?
Freshly squeezed tastes brighter and cleaner. Bottled works in a pinch, but the flavor can be flat. If using bottled, add 1 tsp extra zest to boost aroma.
What’s the best way to get neat slices?
Chill at least 2 hours, then use a long, sharp knife warmed under hot water and dried. Wipe the blade after each cut. Trim edges before slicing squares.
Can I make Vanilla Bean Lemon Bars with lemon zest ahead of time?
Yes. Bake up to 24 hours ahead. Chill, cover, and dust with powdered sugar just before serving. The flavor actually improves by the next day.
Why did my top crack?
Overbaking or whisking in too much air can cause cracking. Mix gently, bake just to a slight jiggle, and cool gradually on a rack before refrigerating.
Call to Action
If you baked these bars, I’d love to hear how they turned out. Drop a comment with your tips, rate the recipe, and save it for later. Share a photo and tag a friend who loves citrus! Craving more? Browse our Spring Desserts collection or find dinner inspiration in Easy Weeknight Dinners.


